Audience
This guide is for Drupal site-builders who build and manage Content Types, Views, Webforms, and/or other built elements of a Drupal site. If you're a Drupal developer you'll likely manage config across instances with Drush instead of the Configuration Sync UI.
Your site must have the Configuration Sync module installed and configured.
What is a Configuration Item?
Most things in a Drupal site are either configuration or content. Content includes pages, media, comments and forum posts. This guide is about syncing things that are configuration, not content.
For the purposes of configuration sync, most of the things you manage under Structure in the Drupal administration menu are config. Configuration items that you'll most often want to sync are:
- Webforms
- Views
- Content types, especially their display and form display settings
What is Configuration Sync?
Drupal's Configuration Sync module allows you to import/export configuration items.
With Configuration Sync, you can:
- Build a Drupal Webform on your dev site, then copy that Webform and all its settings to production.
- Revert a round of changes made to a Drupal View on your dev site, resetting it to the version that's live on your production site.
When & Where to Config Sync
Scenario 1: You have built a new Drupal Webform in your dev site. You've adjusted settings and tested it. Now you're ready to launch the Webform on production.
Export your new Webform's configuration from the dev site and import it into production, using the Configuration Sync feature for both steps.
Scenario 2: You're about to do some experimental changes on a configuration item, and you want to take a backup before you begin. You plan to restore your backup if your experiments don't work out.
Export the configuration of the item before you begin, from the instance (such as dev) that you're about to begin work on. You are essentially saving a backup copy of the item.
This saves a copy with any recent changes that you or anyone else may have made to this item, on this instance, since the last deployment to production.
Scenario 3: You've made your experimental changes and now you're ready to restore your backup.
Import the text file you saved during Scenario 2. You're importing back to the same instance (such as dev) where you're making changes.
Scenario 4: You have made some changes to a configuration item, such as a view or webform, but your changes didn't work out as you hoped. Now you want to revert all your changes. If you did not export a backup before you started, you still have the option of resetting the view or webform back to the version that's currently on production.
Ideally, you'd save a backup before you start making changes (scenario 2). But that's not always what happens in practice. That's what this scenario is for: you've made a set of changes in dev, but your changes have gone wrong. You need to revert the view or webform back to its original state.
Never fear! There is a working version on staging and/or production. You can export the config item from production and import it to the dev site. The downside is that you'll lose all changes that anyone has made to this item in your dev environment, which may or may not be limited to the recent changes you're currently looking to revert.
Exceptions and Special Cases
Menus
Menus are configuration, but each menu item is a piece of content. Yes, this is a bit confusing from the perspective of a site builder. Just keep it in mind to avoid problems.
Entire Site Config Sync
Only the single item config sync option is enabled on your Skvare-hosted site. The entire site option is intentionally disabled. You never want to use this option. If you're in a situation where you think an entire site config sync is the solution, please let us know — we can help!
Config Lockdown
On your Skvare-hosted site, there are some types of configuration items you can't change in production because configuration is locked down. These same types of items cannot be updated by importing into production via a Configuration Sync, either. You can export these types of items from production, but you can't import them in.
CiviCRM Fields and Options
If you use CiviCRM, and you're working on a CiviCRM-integrated feature such as a Drupal Webform or View, be careful of potential differences in your CiviCRM databases on your dev site vs production.
- If your Webform or View uses any CiviCRM custom fields, the fields must have the same custom field ID in dev and production.
- Any CiviCRM dropdown options you use must be identical across dev and production, including option IDs. These could include: the "Location" options for an address, phone or email; Website Types; Gender options; Relationship Types.
- Any other CiviCRM data that you directly reference in your configuration item, such as:
- A Webform which uses the "Static" setting for a select field of Membership Types
- A View which includes a non-exposed filter on Financial Type
You're safe if your dev site has been refreshed from production recently, and no changes like the ones listed above have been made in CiviCRM since then. A dev site refresh copies your entire CiviCRM database — custom fields, options, settings and all — from production to dev. You can be confident that everything matches.
How to Export a Single Configuration Item
Export a single item for import in another instance, or to maintain as a backup.
From the Admin Toolbar > Configuration > Development > Configuration Synchronization.
Image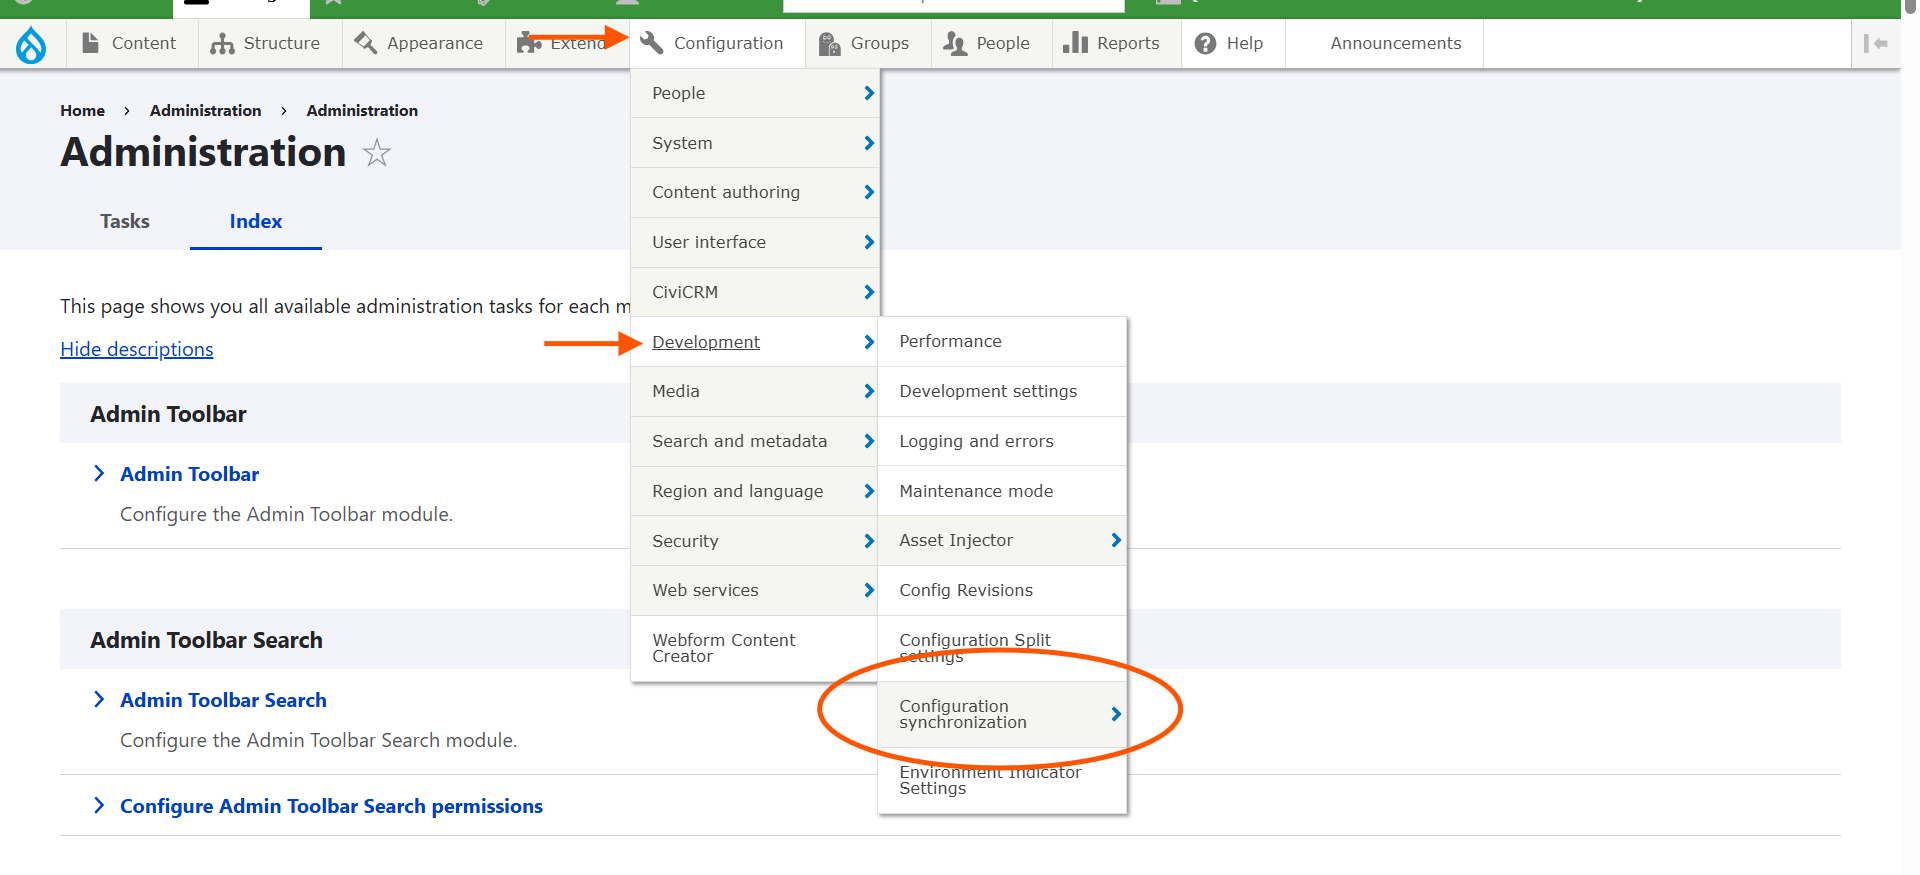
Select Export from the tabs near the top of the screen:
Image
The page will default to the "Full archive" option, which is not what you want. Switch to the Single item tab.
Image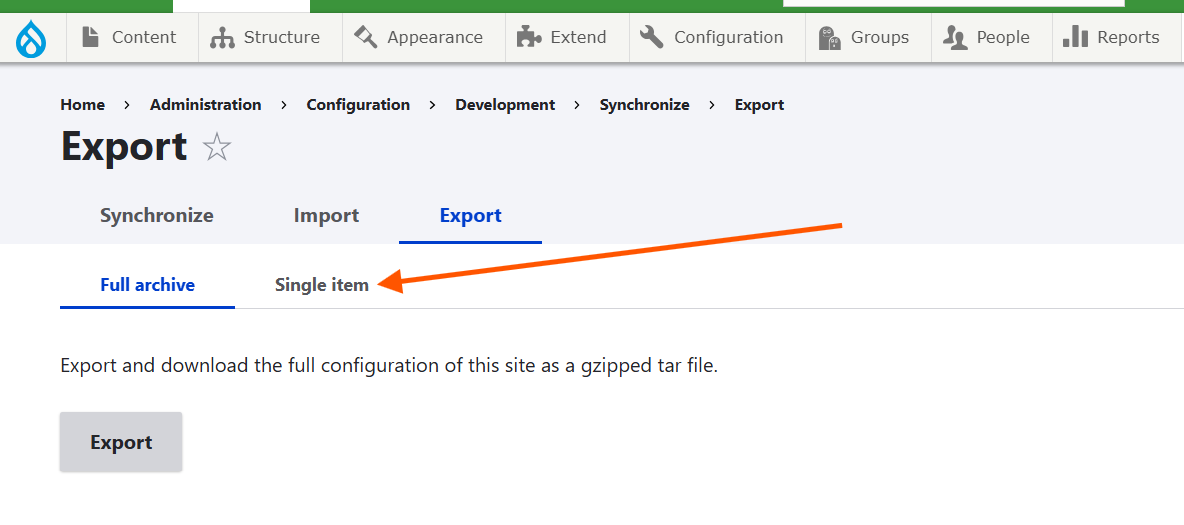
- Choose the Configuration Type from the dropdown.
Select "View," "Webform," or another option depending on the type of item you're working on. The options available may not be identical to the ones in this screenshot:
Image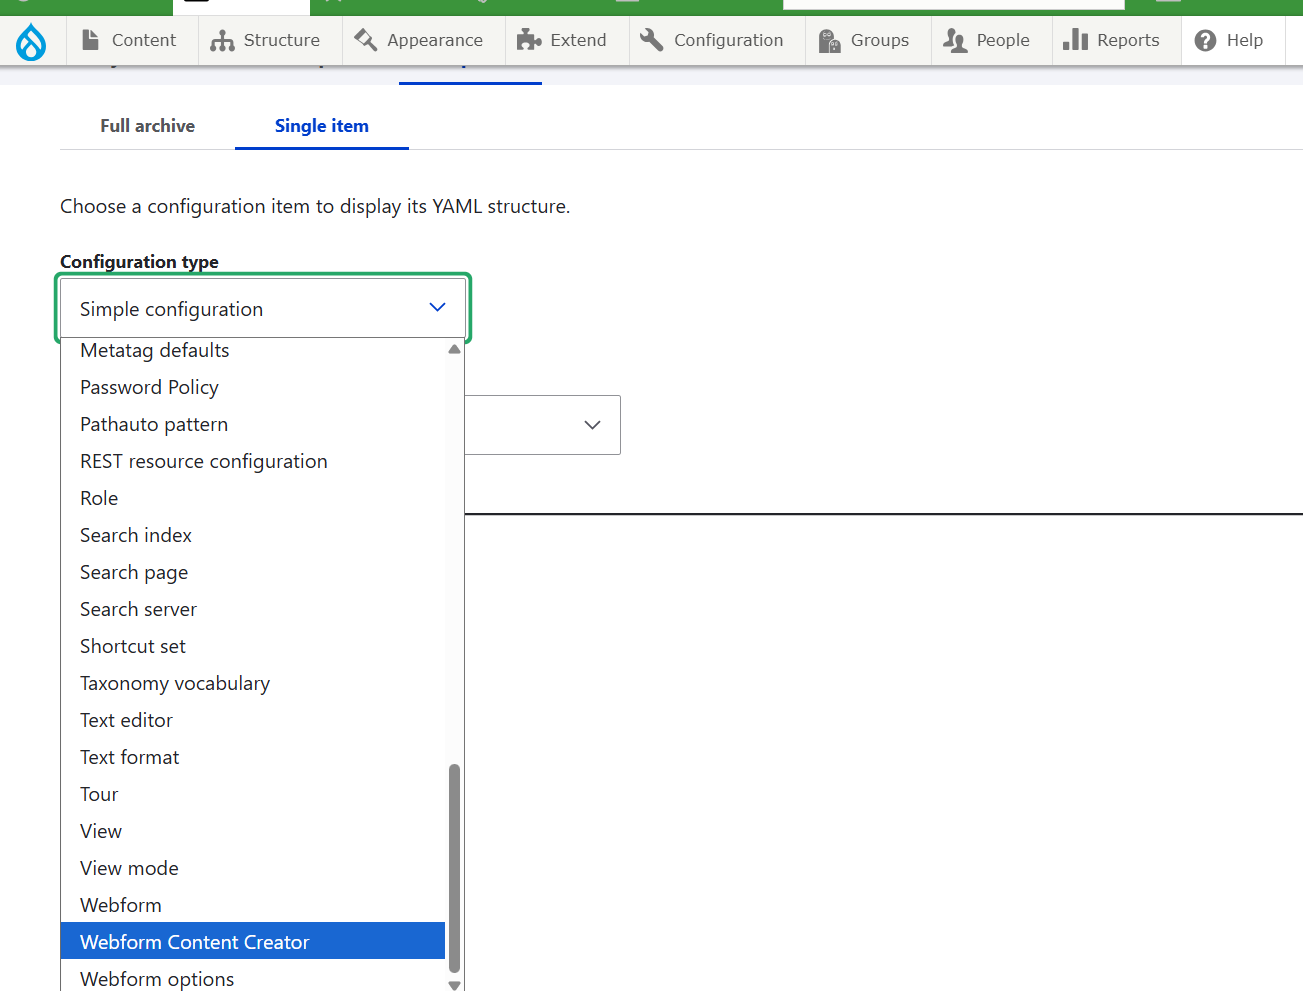
- After choosing a Configuration Type, you'll have a populated list of configuration items to choose from. Choose your item in this field.
Your options will not be identical to the list of configuration items shown in this screenshot:
Image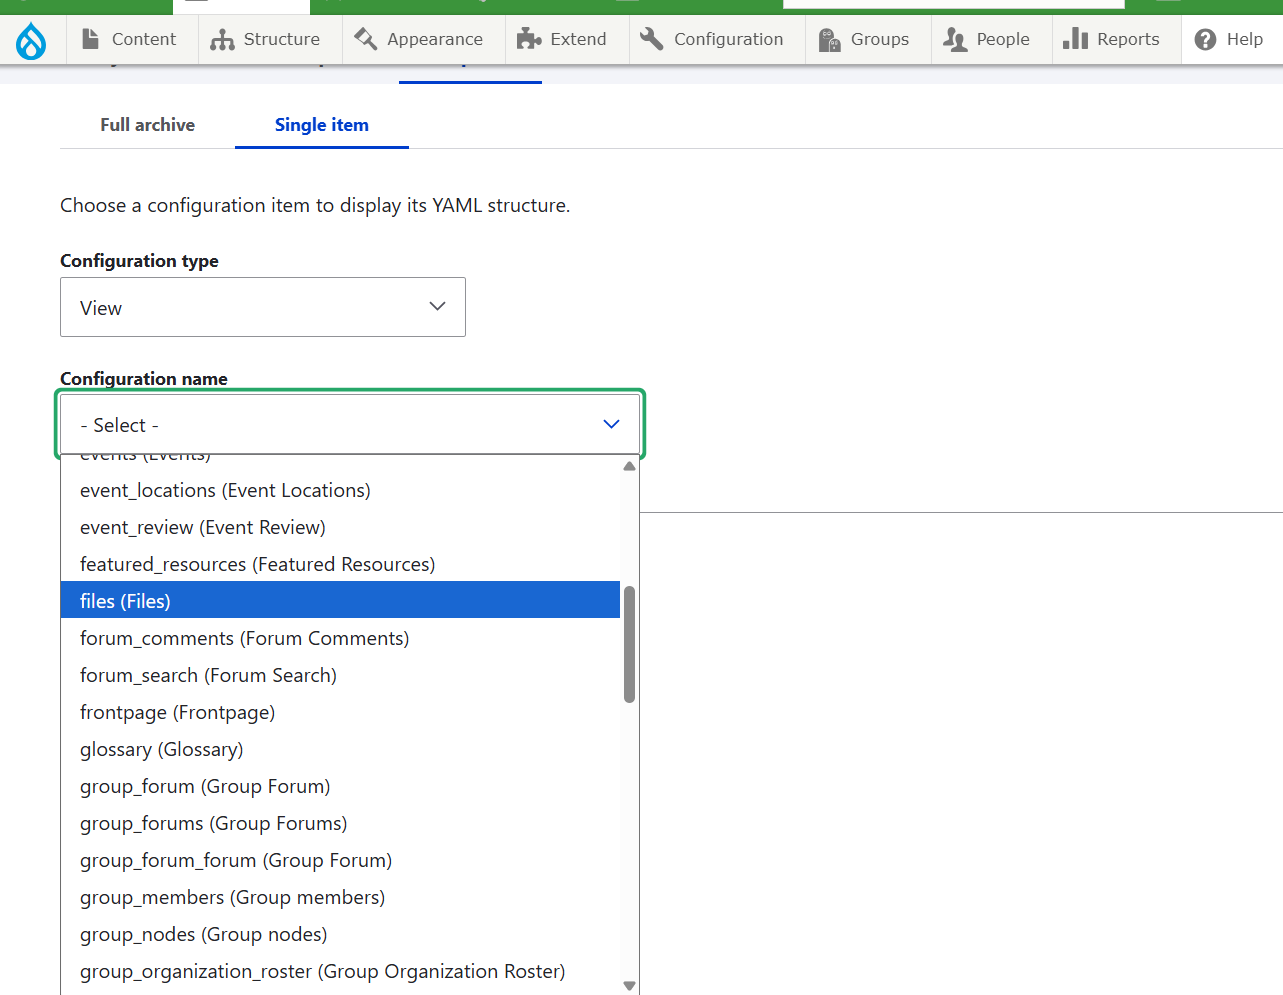
- Copy the configuration
- When you choose the configuration item you want to export, Drupal will generate a YAML file that contains the configuration settings. It will appear in the large textarea field under the label "Here is your configuration:"
Select the entire contents of this textarea and copy it to your clipboard. This is just a plain select-all-and-copy with your mouse and/or keyboard.
Image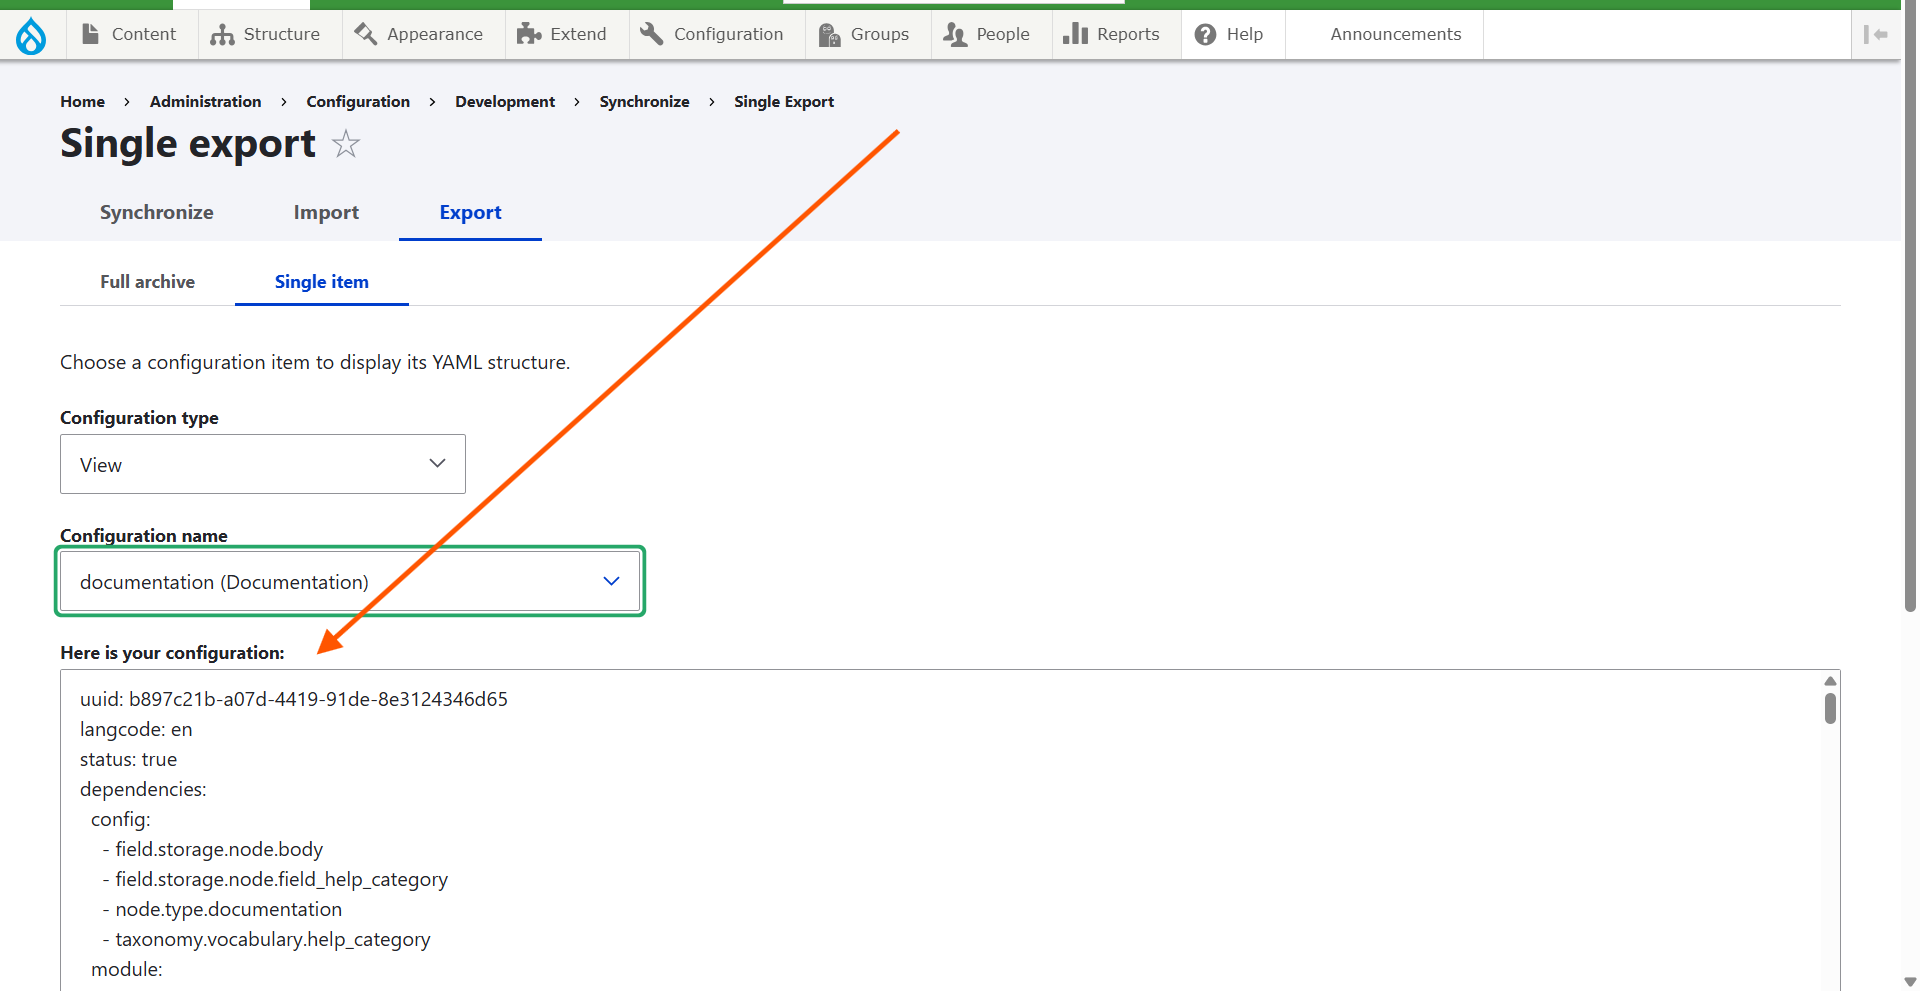
- Save
- Paste everything you've just copied into a new empty file. A blank text file in a text editor is ideal.
- Save your new file. Give it a meaningful name.
- Just below this textarea field, Drupal is telling you its own name for this YAML file. Example: "Filename: views.view.documentation.yml." It's very useful to incorporate this into the filename you choose for your text file.
- You'll probably end up with multiple copies of the same YAML file. Depending on the complexity of the changes you're working on, you may want to retain them as separate point-in-time snapshots. Append the current date, or some keywords referencing the changes you're about to implement, to distinguish this YAML file from your other point-in-time snapshots of the same configuration item.
How to Import a Single Configuration Item
- From the Admin Toolbar > Configuration > Development > Configuration Synchronization.
- Image
Select Import from the tabs near the top of the screen:
Image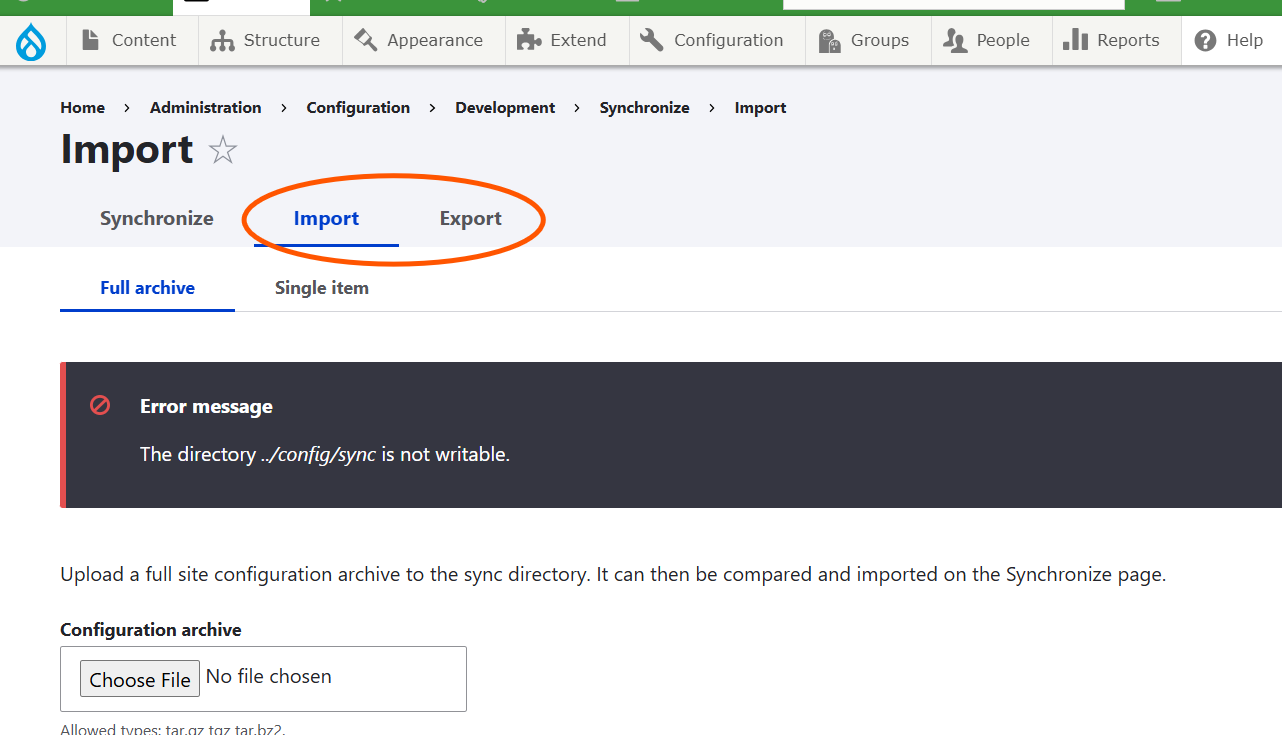
The page will default to the "Full archive" option, which is not what you want. Switch to the Single item tab.
Image
- Choose the Configuration Type from the dropdown.
Select "View," "Webform," or another option depending on the type of item you're working on. The options available may not be identical to the ones in this screenshot:
Image
- Consult the YAML file you previously saved using the export process. Copy the entire file's contents and paste it into the textarea labeled "Paste your configuration here."
- Click the Import button to submit.
Tips for Keeping Backups with Config Sync
Your Skvare-hosted site gets frequently automatic backups, but restoring an entire site from backup is a last resort for emergencies only. Keep your own backup copies of Drupal configuration items that you're working on, so you can painlessly restore just a single item if you need to.
- Always make a single item configuration export before testing major changes or testing unknown configuration.
- Save and maintain your backup files. Give the files clear names so you can find them in a pinch.
- For a belt-and-suspenders approach, save your configuration exports somewhere that you can access remotely, and where they'll get backed up. Cloud file storage (Google Drive, OneDrive, Dropbox, etc) is ideal.