Redmine is Skvare's project management system. This is where you will go to request support from the Skvare team. Please post your communications in Redmine, rather than emailing Skvare team members directly, to help track all important details in one accessible central location.
To access Redmine, go to https://projects.skvare.com/
You will primarily use two tabs in Redmine:
- Issues - lists all filed issues, including all communication with Skvare team members
- New issue - allows you to create a new issue
Creating a New Issue (New Task)
Submit any new issue, task, or request to us in Redmine as a New Issue.
- Tracker: "Task" will be selected by default
- Subject: succinct yet descriptive title for the task
- Description: overall details of the task. This will appear in the email notifications. Keep the description concise and use comments to add additional details if necessary.
- Status: your new task will start out with a status of "New." For details on what the other statuses mean, see Reference: Task Status.
- Assignee: Please assign new tasks to your Project Manager. They'll assign it to another Skvare team member as needed.
- Files: If there are any file attachments relevant to the issue, click Choose Files and upload them to the task.
- Watchers will receive email notifications whenever this task is updated. Email notifications are also always sent to the task's author and the task's current assignee.

Leaving Comments
Comment via Email
You can provide feedback and leave comments on an issue by simply replying to the email notification you receive from Redmine. Your reply will be logged in Redmine on the task.
Comment via Redmine
Click the Edit link at the bottom of a task to leave a comment.
More Tips and Tricks
Formatting Tools
Below the notes field are three options for viewing and creating your comment: Textile, Visual editor, and Preview. We recommend using the Visual editor option. The visual editor gives you a toolbar with a set of formatting tools such as bold text, headings, and bulleted / numbered lists.
Mention / Tag Users by Name
To mention and tag someone, type @ followed by the person's name. As you start typing the name, an autocomplete will appear with a list of users who match what you've typed. Click the name to select the user. For example, type @bryan and then click on Bryan Daniels.
Embed images
You can display images in your task descriptions and comments. This is useful when a screenshot is the main topic of your note, and you want the image to be prominent.
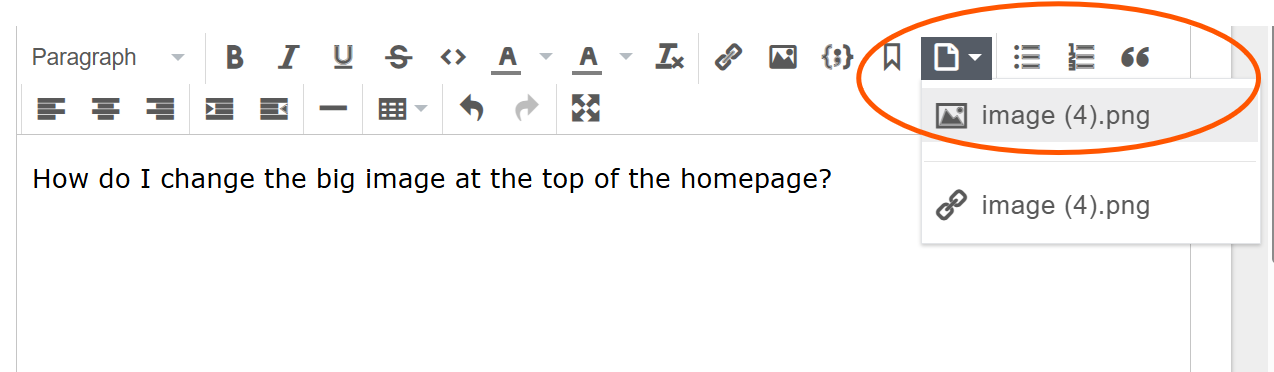
First, upload the image using the Files upload feature. Make sure you're in Visual Editor mode to see the formatting toolbar. In the toolbar, click the paper icon to expand a small submenu, and click the image icon in the submenu.
Link to file uploads
Your task description or comment can include links to your uploaded files.
It's not necessary to link to a file. If you upload files as attachments with your new task or your note, the upload will be stored on the task.
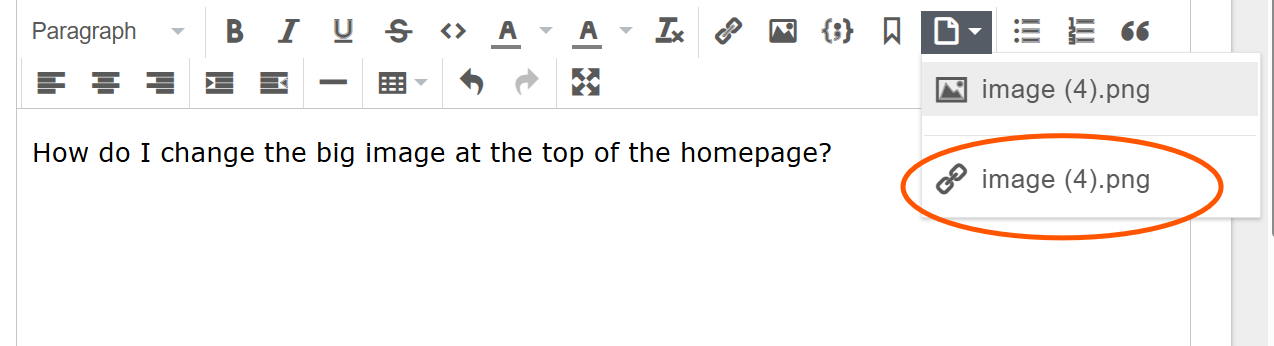
First, upload the image using the Files upload feature. Make sure you're in Visual Editor mode to see the formatting toolbar. In the toolbar, click the paper icon to expand a small submenu, and click the chain-link icon in the submenu.
Reference: Task Statuses
Your Skvare Project Manager will generally manage the status of tasks. Here's a guide to what each one means.
- New: Newly created tasks will have a status of New for a task that has been submitted but is not yet ready for development.
- Ready for Development: A task is Ready for Development after it has been approved by the client and has been assigned by the project manager for work to begin.
- In Progress: Before work to complete the task begins, the person assigned to the task will change the status to In Progress. This indicates development or configuration work has started.
- Feedback: The status will be changed to Feedback when there are questions related to the task for the client.
- Deploy: After the task has been reviewed by the client and verified in dev or staging, the status will change to Deploy and will be pushed to the live website.
- Resolved: The status will be set to Resolved once the task has been deployed to production and no further feedback is required. A task may remain set to Resolved because there are related unfinished tasks.
- Closed: Project Managers will close a task once the client has verified the work is complete and no further action is required.
- Hold: Project Managers may set the status to Hold when the task either is not ready to begin, or there are budgetary, time, or other reasons why development should not start. A task set to Hold can be moved to Ready for Development with client approval.
- Backlog: Project Managers may set the status to Backlog when a task has been approved for development, but due to workload it cannot yet be moved to Ready for Development.
- Ongoing: These are tasks that are performed on a regular basis such as upgrades or monitoring.